We all are familiar with the recycle bin feature of the Windows, MacOS, and iPhone. It allows you to recover files that you have deleted accidentally. Unfortunately, Android doesn't offer any built-in recycle bin feature like these operating systems.

Sometimes you may delete some important files (such as your photos, videos or documents) on your Android phone by mistake. Now imagine what if we tell you that you can add a recycle bin folder on Android also. This is what we are going to discuss in this tutorial.
After adding a recycle bin on your Android phone, any file that you will delete will automatically move to the recycle bin folder. They will be deleted permanently after some fixed time period. Before that, you can recover any file if you have deleted it accidentally.
Some Android phones now have added recycle bin feature in their built-in gallery app like the iPhone. One of the examples is Samsung. This feature is disabled by default but you can enable it by following these simple steps -
After you have enabled the recycle bin, whenever you will delete any photo or video from your gallery, they will be moved to the recycle bin folder first. This feature is limited to the gallery app only i.e. if you will delete any file from other app (such as file manager), then they will be deleted permanently.
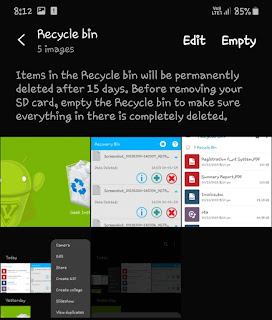
If you want to access the recycle bin on your Android phone, open the gallery app, go to the menu (three dots), and then click the Recycle Bin option. There you've it. The deleted files will stay there for 15 days. Before that time period, you are allowed to restore them.

To recover any file, you simply need to select it and then click the Restore button. You can also clear the Recycle Bin using the Empty button. This will help you to free up some space on your phone.
Another alternative to add a recycle bin on your Android phone is by using the third-party app. There are so many options available at your end. If you search the "Recycle Bin" keyword on Google Play Store, you will find so many results on the list.
One of the apps that we will recommend you to try is Recovery Bin. Here's a step-by-step guide on how to use this app -
Sometimes this app doesn't work properly. So we will recommend you to check if it is working on your phone or not. There are some features that are missing in this app. One of them is an automatic deletion that could be helpful to clear the recycle bin automatically.
Some file manager apps also provide a recycle bin feature in them. File Manager by ASUSTek is one such example. It is one of the most popular file manager apps for Android with over 100M+ downloads.
The recycle bin feature is enabled in this file manager app by default. Any file that you will delete will automatically move to the recycle bin folder. However, you can also choose to delete it permanently at the time when you are asked to confirm the deletion.
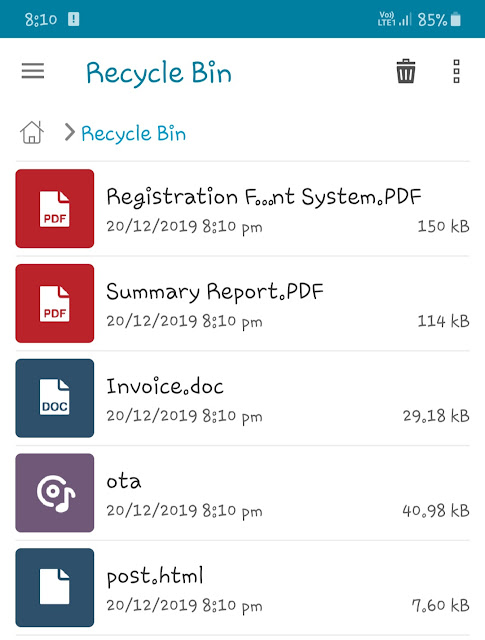
On the home page of the file manager, you will see the Recycle Bin option where you can access all your deleted files and restore them.


Sometimes you may delete some important files (such as your photos, videos or documents) on your Android phone by mistake. Now imagine what if we tell you that you can add a recycle bin folder on Android also. This is what we are going to discuss in this tutorial.
After adding a recycle bin on your Android phone, any file that you will delete will automatically move to the recycle bin folder. They will be deleted permanently after some fixed time period. Before that, you can recover any file if you have deleted it accidentally.
1. Use built-in recycle bin in Gallery
Some Android phones now have added recycle bin feature in their built-in gallery app like the iPhone. One of the examples is Samsung. This feature is disabled by default but you can enable it by following these simple steps -
- 1. Go to the app drawer on your phone and open the Gallery app from there.
- 2. Next, click the menu button (three dots at the top-right corner of the screen).

- 3. In the menu list, find an option named Recycle Bin and click on it. If no such option is available, then go to the Settings and find out there.
- 4. After that, a dialog box will open asking you to enable the recycle bin. Simply, click the "Turn on Recycle bin" option. That's it.

After you have enabled the recycle bin, whenever you will delete any photo or video from your gallery, they will be moved to the recycle bin folder first. This feature is limited to the gallery app only i.e. if you will delete any file from other app (such as file manager), then they will be deleted permanently.
If you want to access the recycle bin on your Android phone, open the gallery app, go to the menu (three dots), and then click the Recycle Bin option. There you've it. The deleted files will stay there for 15 days. Before that time period, you are allowed to restore them.

To recover any file, you simply need to select it and then click the Restore button. You can also clear the Recycle Bin using the Empty button. This will help you to free up some space on your phone.
2. Use Recovery Bin app
Another alternative to add a recycle bin on your Android phone is by using the third-party app. There are so many options available at your end. If you search the "Recycle Bin" keyword on Google Play Store, you will find so many results on the list.
One of the apps that we will recommend you to try is Recovery Bin. Here's a step-by-step guide on how to use this app -
- Download and install the Recovery Bin app on your Android phone.
- As you launch it, the app will ask you to allow storage access. After that, the Recycle Bin will start working in the background. You will see its notification in your notification tab.
- Now if you will delete any file (such as photos or videos) on your Android phone from the gallery or file manager, they will automatically move to the Recovery Bin app.
- The process of restoring any file is quite simple. Simply, click the drop-down button next to the file and then tap the + button. On the other hand, if you want to delete the file permanently, you can click the X button.

Sometimes this app doesn't work properly. So we will recommend you to check if it is working on your phone or not. There are some features that are missing in this app. One of them is an automatic deletion that could be helpful to clear the recycle bin automatically.
3. Use File Manager app
Some file manager apps also provide a recycle bin feature in them. File Manager by ASUSTek is one such example. It is one of the most popular file manager apps for Android with over 100M+ downloads.
The recycle bin feature is enabled in this file manager app by default. Any file that you will delete will automatically move to the recycle bin folder. However, you can also choose to delete it permanently at the time when you are asked to confirm the deletion.
On the home page of the file manager, you will see the Recycle Bin option where you can access all your deleted files and restore them.

- Also read: How to delete junk media files on WhatsApp