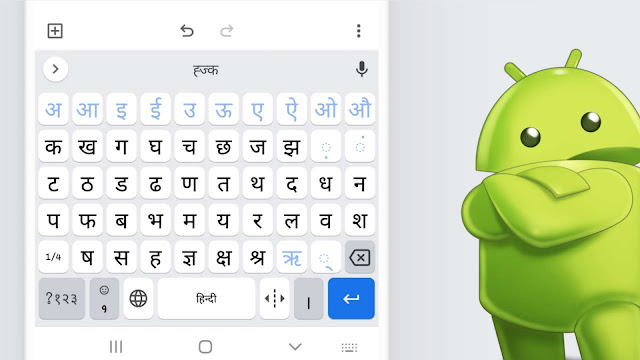
English is set as the default language on a keyboard that comes built-in with every Android phone. There would be many people from Asian countries like India who would like to use their native Hindi language on their phones. Hindi is one of the most popular languages in the world. Various reports have shown that the usage of Hindi language has rapidly increased on the internet over the last few years.

Apart from the built-in keyboard of your phone, there are various other keyboard apps available for Android like Gboard, SwiftKey, etc. Luckily, all these keyboards also support Hindi language but it is quite tricky to find any option for changing the keyboard language. If you are struggling with that, then don't worry as we will guide you in this tutorial on how to add Hindi language on your keyboard.
You would be able to type in Hindi on your Android phone. Apart from that, there is another awesome feature available called Hinglish which is a blend of Hindi and English language, allowing you to convert Hindi-based English words into Hindi automatically. We have discussed almost all popular Android keyboards in this tutorial. Now without wasting any time, let's get started.
The Hindi language is already available in the built-in keyboard of every Android phone, however, it is not enabled by default. You have to enable it manually from the keyboard settings. Just follow this step-by-step guide -
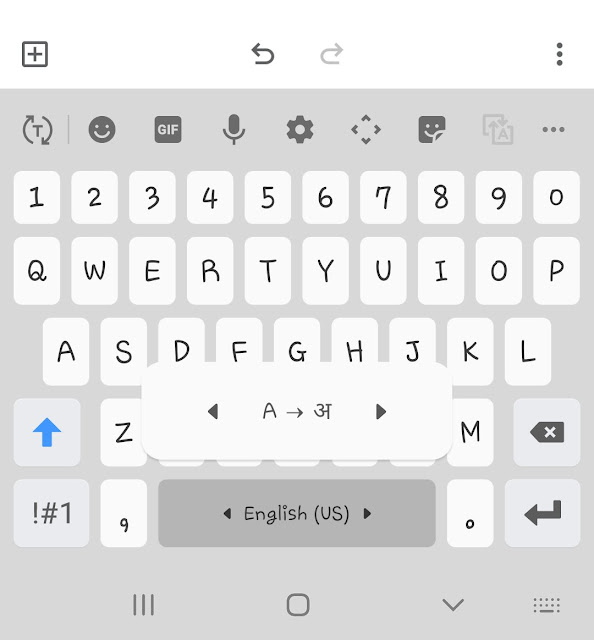
Sometimes you need to use both English and Hindi languages on your keyboard. It would be a tedious task to switch between them manually. Wait! There is a very simple way you can do that. First, you have to keep both English and Hindi languages enabled on your keyboard settings. After that, just click on the space button on your keyboard and move it to right or left to change the language. (See below picture)

Google has its own official keyboard app for Android named Gboard. This app is available for free on Google Play Store. Some people might be using the Gboard app as the default keyboard on their smartphones. You can also enable Hindi language in Gboard. Here's how you can do it -
Google has another keyboard for Android, especially for Hindi typing. This keyboard is named Google Indic Keyboard. It is also available on Google Play Store for free. This step-by-step guide will show you how to set up this keyboard on your Android phone -
SwiftKey is another popular keyboard for Android made by Microsoft. If you are using the SwiftKey keyboard on your phone, it is pretty simple to enable Hindi language in it. Simply, open the SwiftKey app and click Langauge option. Under Suggested languages, you will find two options for Hindi language: Hinglish and Hindi (+Phonetic) / हिन्दी.
Click anyone you want to use and then tap the Download button. Once the language is downloaded, open the SwiftKey keyboard anywhere you can type on your phone. It will ask you to set the default language. Select the new Hindi language you have just downloaded. That's it. If you want to switch between languages, simply tap the space button and move it right or left.
So that's how you can add Hindi language on your Android phone. When it comes to using Hindi (or Hinglish) language keyboard, there are different options available for Android users. Let us know which one you are using. Feel free to ask anything in the comments below. If you find this guide helpful, please support us by sharing our content with your friends on social media. Stay tuned for more interesting tutorials!

Apart from the built-in keyboard of your phone, there are various other keyboard apps available for Android like Gboard, SwiftKey, etc. Luckily, all these keyboards also support Hindi language but it is quite tricky to find any option for changing the keyboard language. If you are struggling with that, then don't worry as we will guide you in this tutorial on how to add Hindi language on your keyboard.
You would be able to type in Hindi on your Android phone. Apart from that, there is another awesome feature available called Hinglish which is a blend of Hindi and English language, allowing you to convert Hindi-based English words into Hindi automatically. We have discussed almost all popular Android keyboards in this tutorial. Now without wasting any time, let's get started.
How to add Hindi language on Android keyboard
The Hindi language is already available in the built-in keyboard of every Android phone, however, it is not enabled by default. You have to enable it manually from the keyboard settings. Just follow this step-by-step guide -
- Open Settings app - Go to the app drawer on your Android phone and find settings gear icon.
- Find Langauge and Input settings - You will find this option in the Advanced settings or General Management.

- Open On-screen/Virtual keyboard - This option is available under keyboards sub-headings.
- Click on your default keyboard - You will find various keyboards that are installed on your phone. Select the one whose language you want to change to Hindi. For example, here we are using Samsung Keyboard which is the default keyboard on our phone.

- Click Languages and Types option and then tap Manage Input languages button.
- Now you will see a list of languages. Find Hindi there and download it (if it's not downloaded).

- Finally, enable the Hindi language and disable English. This will automatically change your keyboard language from English to Hindi. Go and check it out.
How to switch languages on keyboard quickly
Sometimes you need to use both English and Hindi languages on your keyboard. It would be a tedious task to switch between them manually. Wait! There is a very simple way you can do that. First, you have to keep both English and Hindi languages enabled on your keyboard settings. After that, just click on the space button on your keyboard and move it to right or left to change the language. (See below picture)

How to enable Hindi language in Gboard app
Google has its own official keyboard app for Android named Gboard. This app is available for free on Google Play Store. Some people might be using the Gboard app as the default keyboard on their smartphones. You can also enable Hindi language in Gboard. Here's how you can do it -
- Open the Gboard app. You will be taken to the Settings page.
- Click Languages option.
- Tap Add Keyboard button at the bottom.

- Next, select Hindi language.
- You will be asked to choose the design of the keyboard. Once after that, tap the Done button.
- Now open any app that you can type with (for example, WhatsApp, Facebook, or Keep app). As the Gboard keyboard opens up, press and hold the space button.
- A pop-up box will appear where you can change your keyboard language. Choose Hindi (India) and that's it.

Use Google Indic Keyboard for Hindi language
Google has another keyboard for Android, especially for Hindi typing. This keyboard is named Google Indic Keyboard. It is also available on Google Play Store for free. This step-by-step guide will show you how to set up this keyboard on your Android phone -
- Download and install the Google Indic Keyboard app.
- Open it and complete the setup process. You have to allow few permissions for the app such as enabling it in your Language settings and then setting it as your default keyboard.
- Once you have allowed all permissions, you will be asked to choose your theme. After that, tap the Get Started button.
- Now open the keyboard on your phone, long-press the space button, and then choose Hindi and Hinglish option. You will be asked to choose the language format you want to use. For example, pure Hindi keyboard, or Hinglish converter.
How to enable Hindi language in SwiftKey app
SwiftKey is another popular keyboard for Android made by Microsoft. If you are using the SwiftKey keyboard on your phone, it is pretty simple to enable Hindi language in it. Simply, open the SwiftKey app and click Langauge option. Under Suggested languages, you will find two options for Hindi language: Hinglish and Hindi (+Phonetic) / हिन्दी.
Click anyone you want to use and then tap the Download button. Once the language is downloaded, open the SwiftKey keyboard anywhere you can type on your phone. It will ask you to set the default language. Select the new Hindi language you have just downloaded. That's it. If you want to switch between languages, simply tap the space button and move it right or left.
So that's how you can add Hindi language on your Android phone. When it comes to using Hindi (or Hinglish) language keyboard, there are different options available for Android users. Let us know which one you are using. Feel free to ask anything in the comments below. If you find this guide helpful, please support us by sharing our content with your friends on social media. Stay tuned for more interesting tutorials!